
Following on from attempting to understand what SSL is, why we want it and why sometimes we don’t have a choice but to take it onboard, you’re peering into the endless screaming abyss of endlessly fiddling around with certificates.
Consider my situation with Ubuntu Landscape:
- I don’t have an external facing web server, so something like Lets-encrypt is not an option.
- I need to easily generate certificates and get them onto target boxes, preferably by some sort of automated means like Ansible
- I need a root cert that I can install on all my machines, phones, clients. Preferably just one, to minimize the fiddling.
- I need to create these certificates easily. I don’t want to have to worry about open ssl versions, remember a gazillion flags, drop down the command line, remember important bits of information, etc
Now, of course you could do it all yourself, like Jamie Nguyen does over at Jamie on Linux, and I recommend that you do that at least once. It’s a good exercise to get the juices flowing: how would you automate this? What are the variables? How does the information flow? How do you do it at scale? What do you keep? What do you throw away? Where are the pain points?
Programs that pitch themselves as CA’s like EJB CA and Dogtag attempt to answer some of those questions by automating the issuing of certificates, using REST interfaces for easy access and LDAP for limiting who can do what. Enter FreeNAS with its CA and certificate issuing functionality.
 FreeNAS CA and Certificate tabs
In the FreeNAS web gui, there are two helpful tabs: CAs and certificates. The CA tab allows you to create a new self signed root certificate and private key, to import a CA (cert and key) that you’ve generated previously or to generate an intermediate certificate off one of the root CAs that you have loaded.
Create a new root certificate
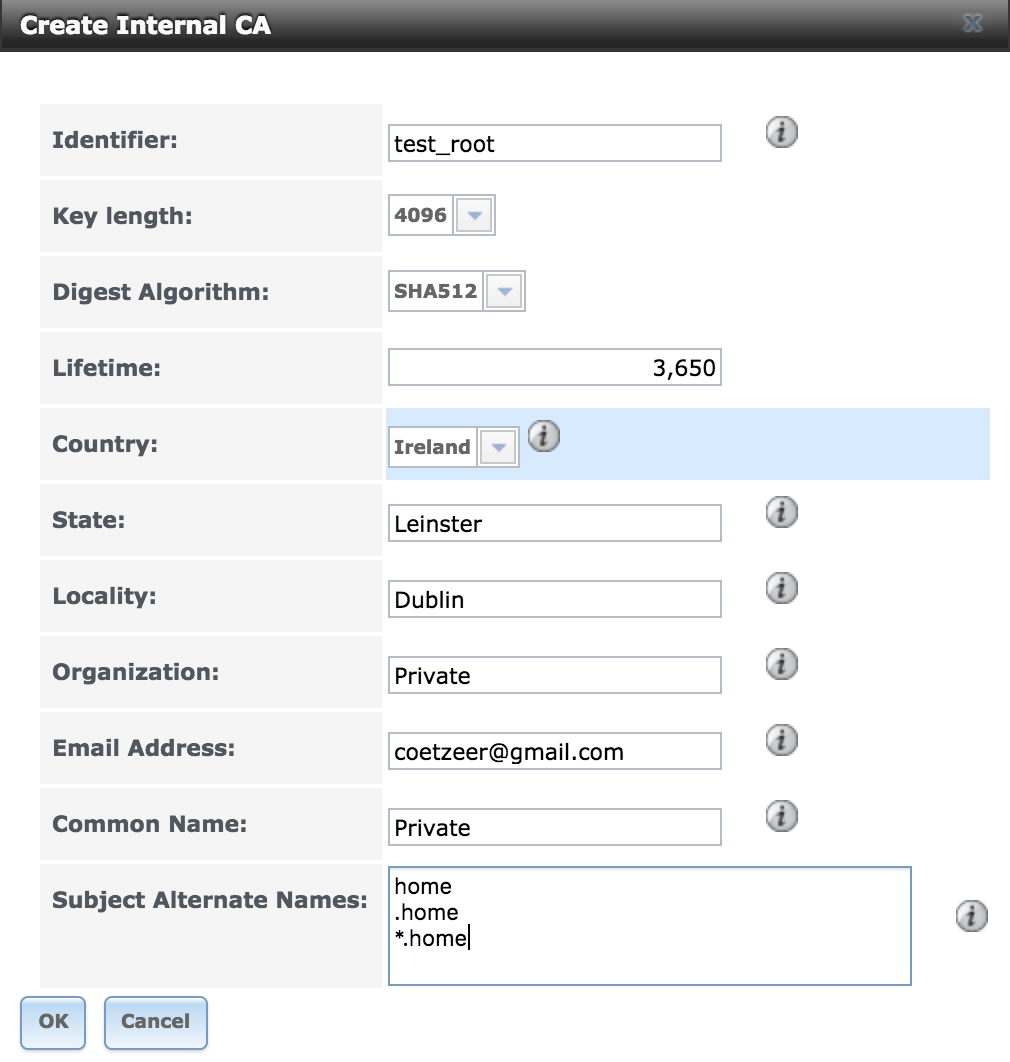 Create a new CA root cert.
You’ll have to fill out some information on the root cert. For details on what each of these required bits of information means, please consult the FreeNAS [documentation]{http://doc.freenas.org/11/system.html#cas} – they do a much better job than I could do at explaining what’s required.
No pressure – this information will recur everytime you see or reference the root cert, so take some time to avoid spelling mistakes and other boo boos.
Now, if you’re managing a whole lot of servers, you might want to consider using an intermediate certificate. And intermediate cert will allow you invalidate only the certificates that are signed that cert. So you if you have different environments that have slightly different security constraints e.g. dev and production, you have two different intermediates that expire at different intervals. The alternative is to sign everything off your root cert, and if you ever need to invalidate that cert, then you’re starting the whole job from scratch.
Create a new signed certificate
Now, you need a certificate that you can install on your web server. Again, consult the FreeNAS docs for detailed information on what each field means. The only additional piece of information I can add is that you need to set at least one Subject Alternative Names item.
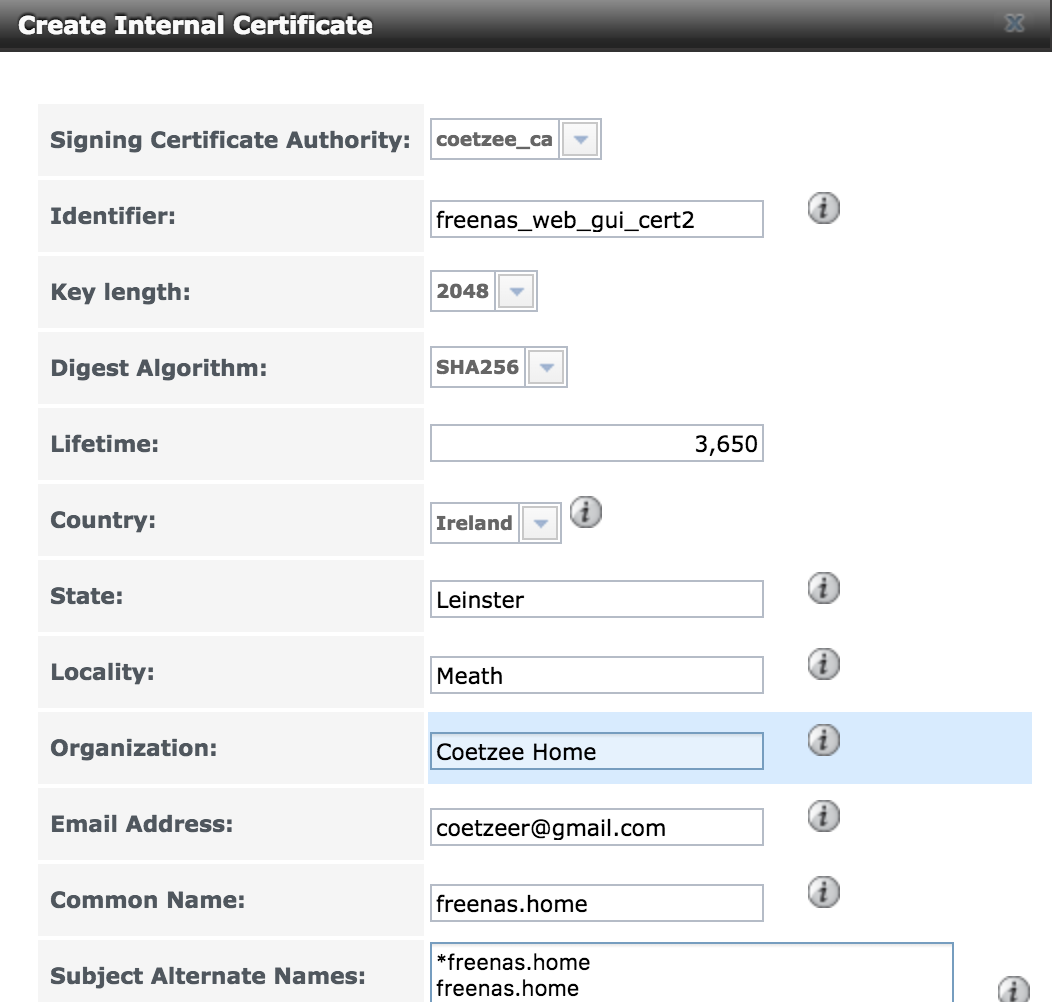 Create a new certificate.
Install your new cert
Once you got the certificate created, download it and install it on your server. Here’s an example of an nginx ssl configuration:
server { listen 443 ssl; server_name gogs.home; # put your FreeNAS generated certs here ssl_certificate /opt/certs/gogs_home.crt; ssl_certificate_key /opt/certs/gogs_home.key; ssl_session_cache shared:SSL:1m; ssl_session_timeout 5m; ssl_ciphers HIGH:!aNULL:!MD5; ssl_prefer_server_ciphers on; add_header Strict-Transport-Security "max-age=31536000" always; # send requests to localhost:3000 - the gogs server location / { proxy_pass http://localhost:3000; } error_page 500 502 503 504 /50x.html; location = /50x.html { root /usr/local/www/nginx-dist; }
}
As a small bonus, here’s how you set up your non-ssl listener to autoforward to the ssl listener:
server { listen 80 default_server; listen [::]:80 default_server; server_name _; location / { return 301 https://$host$request_uri; } }
This will get you as far as the beginning of the ‘least lazy’ ssl post: a browser warning. Also, I would still have my landscape problem, because although the certificate on the server is part of chain, it’s still not signed by anyone that the browser or landscape client would recognize.
Add the root cert to your clients
This step will vary from platform to platform and even browser to browser. My first priority is to get landscape working, so I’m going to start with ubuntu.
The temptation is to add the root certificate as an exception in a browser and think you’re done. If you want certificates signed by your root cert to be recognized by all clients from python scripts to browsers, you need to aim for your system CA cert installation.
Ubuntu
These steps are blatantly copied from manuals.gfi.com
- Copy your CA to dir
/usr/local/share/ca-certificates/ - e.g:
sudo cp foo.crt /usr/local/share/ca-certificates/foo.crt - Update the CA store by running the following command:
sudo update-ca-certificates
CentOs 6 + 7
- Install the ca-certificates package:
yum install ca-certificates` - Enable the dynamic CA configuration feature:
update-ca-trust force-enable - Add it as a new file to /etc/pki/ca-trust/source/anchors/:
cp foo.crt /etc/pki/ca-trust/source/anchors/ - Use command:
update-ca-trust extract
MacOS
- Download the certificate from FreeNAS onto your Apple MAC
- Open up Keychain Access
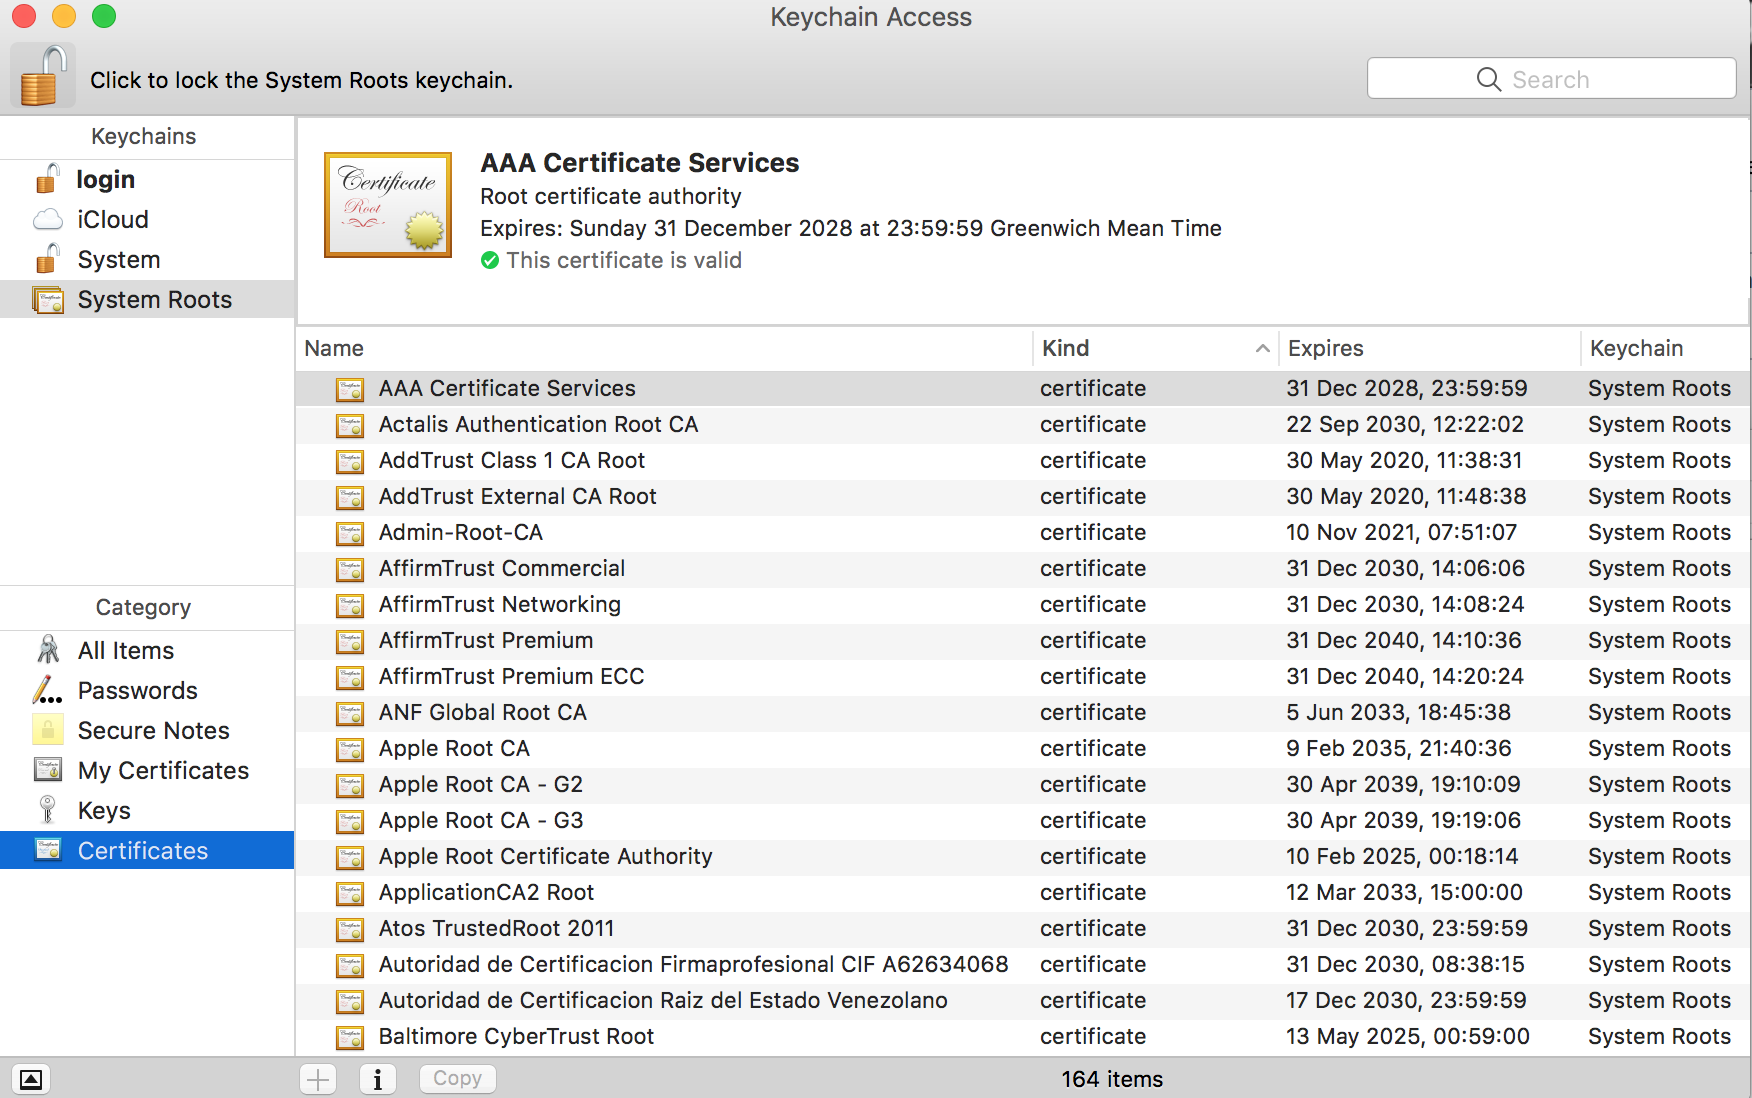 Keychain Access: Just opened
- Select System at the top (you can’t import into System Roots)
- Select Certificates at the bottom left.
- Click the Lock Icon at the top left of the window
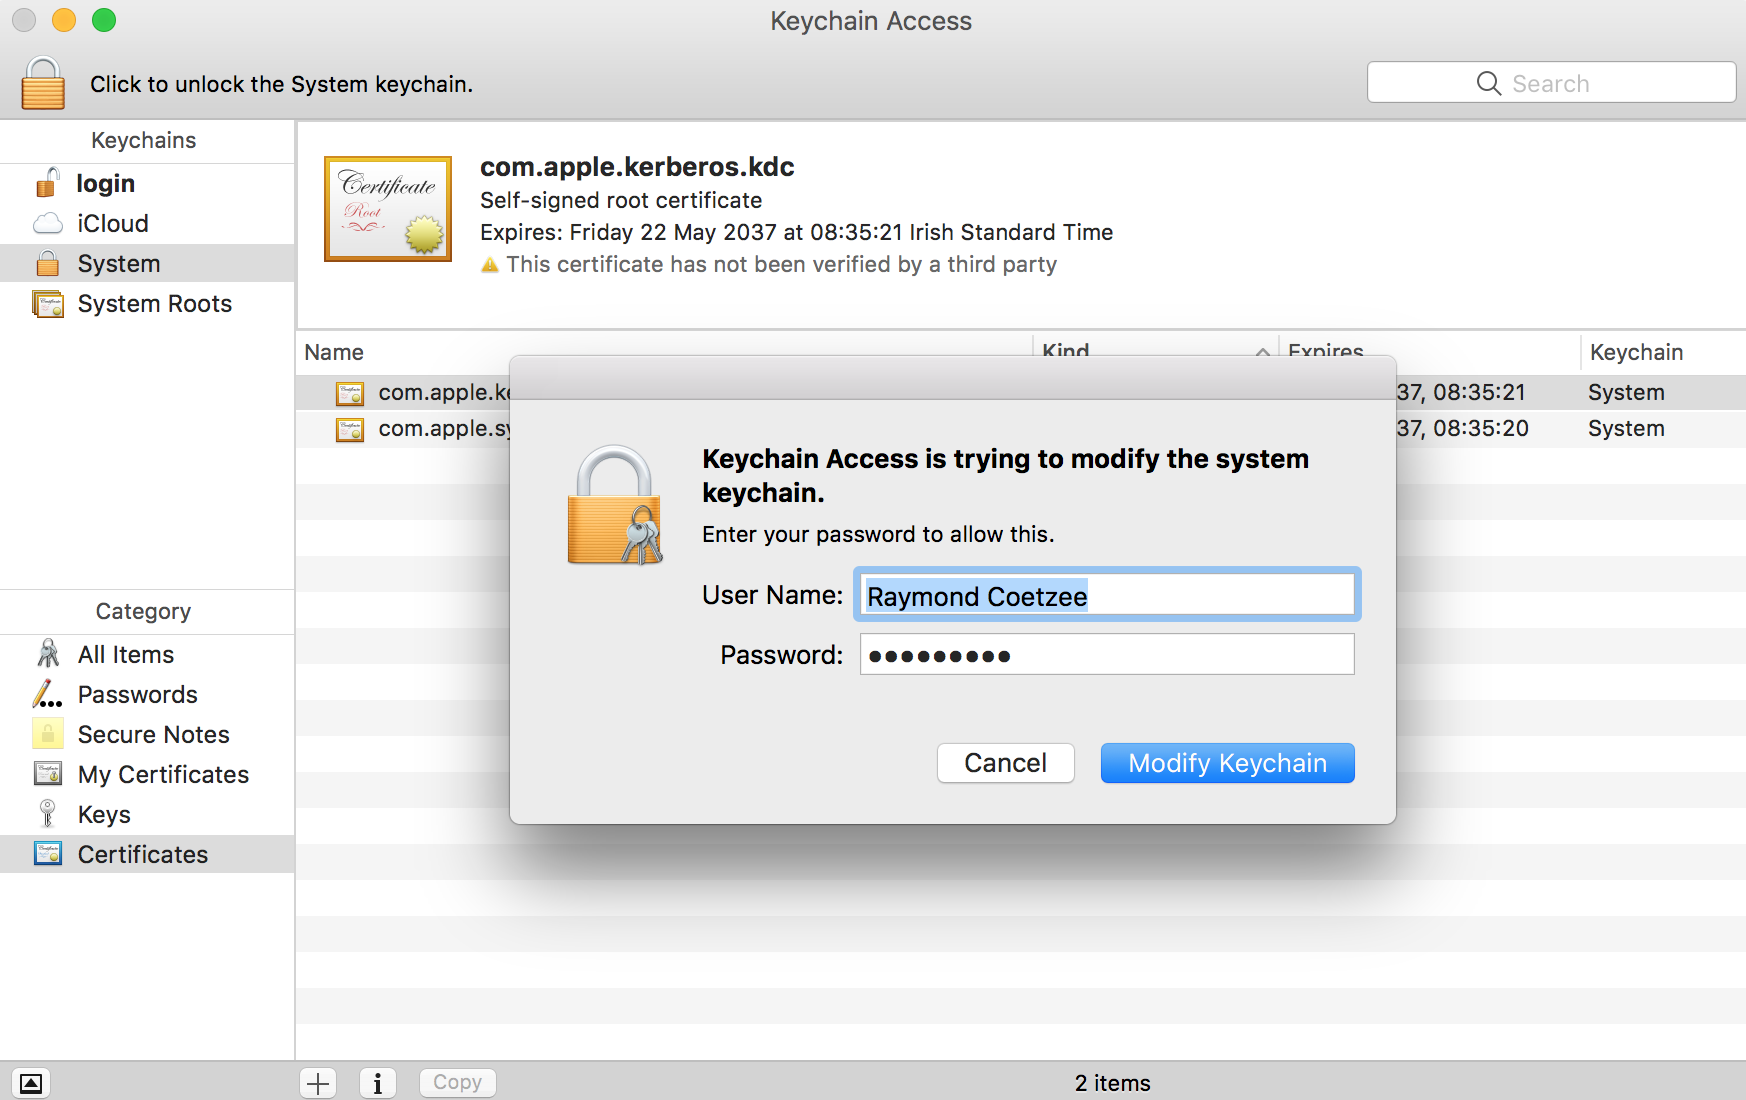 You’ll probably be asked for a password.
- You should now be able to click the plus sign at the bottom of the certificate list.
- Select your new CA cert and click import.
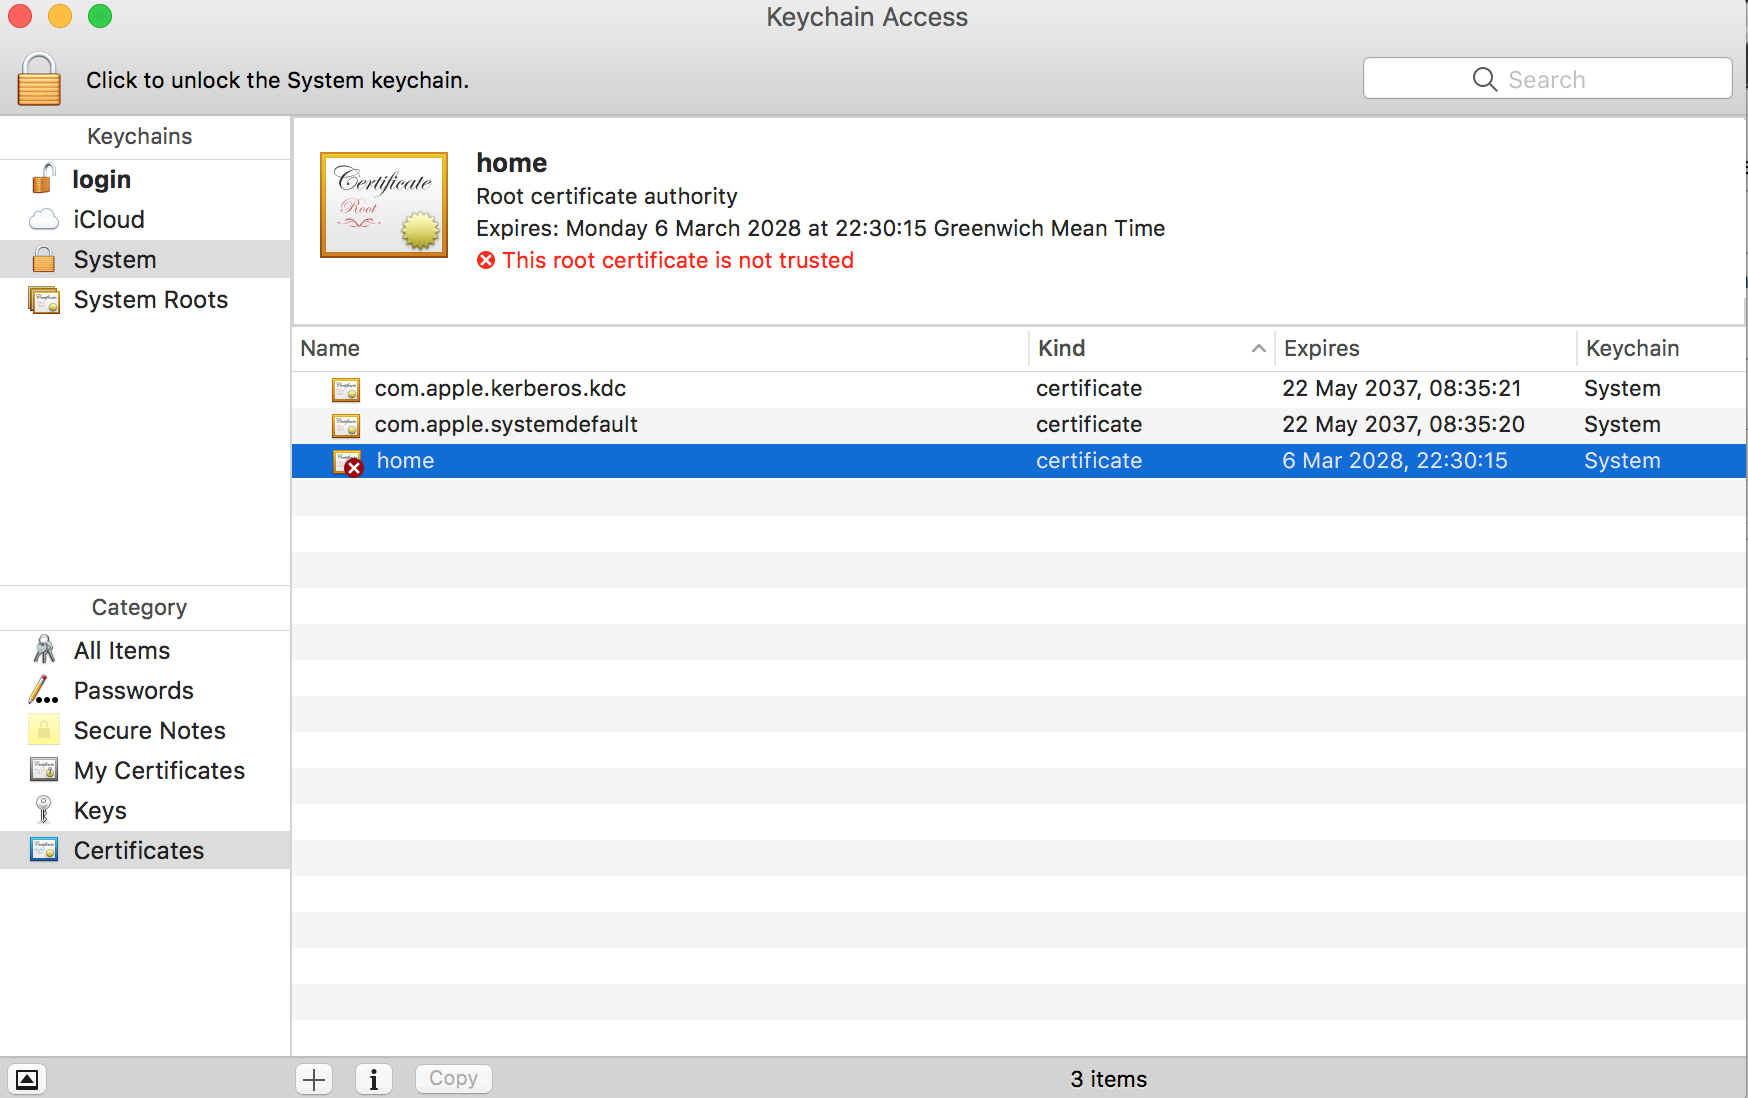 Keychain Access: Just after you’ve imported your CA certificate.
- Your new certificate should appear with a red cross next to it.
- Right click on it and select “Get Info”
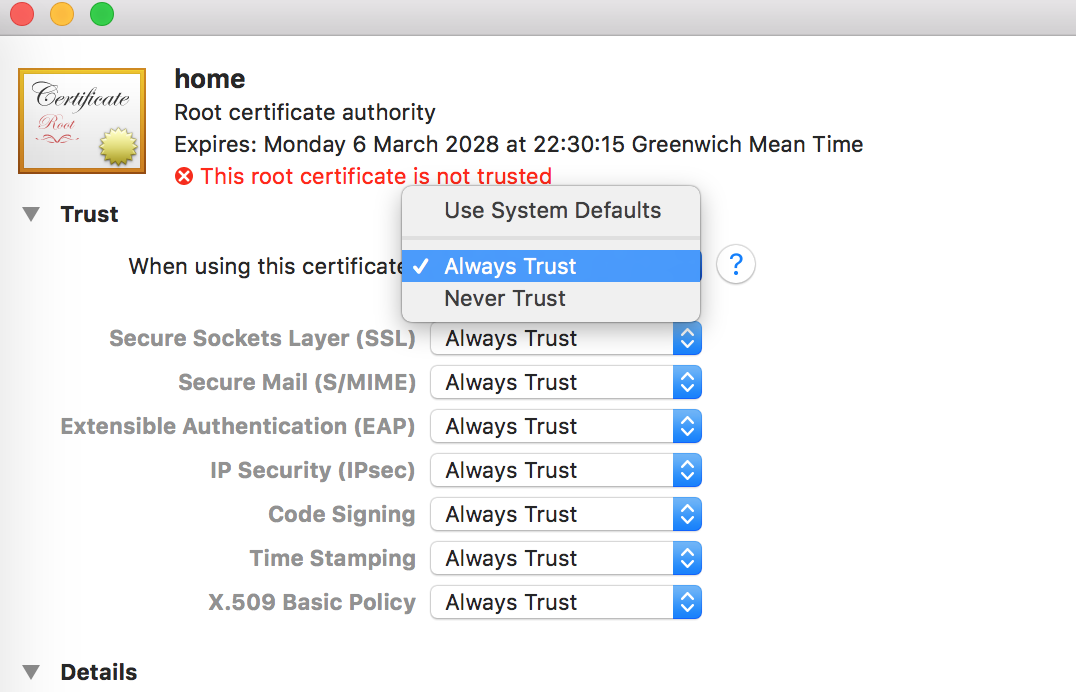 Select Trust of course.
- Expand the Trust section and click on the drop down next to ‘When using this certificate:’ and select ‘Always Trust’
- Click OK – you should have a lovely blue checked CA certificate.
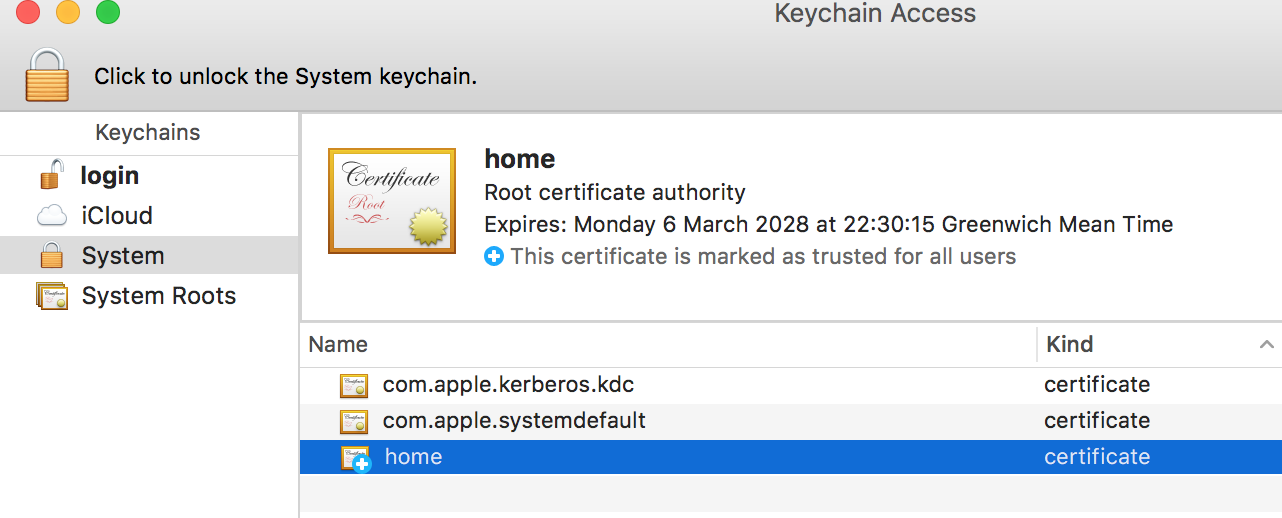 Happy Blue Cert.